Unlike many other digital platforms, Sessionize isn't based on a pay-ahead principle. Our first-time users have the opportunity to test Sessionize in all of its glory, with no limitations or hidden costs of any kind. We encourage you to create and fully configure your event. Only after you make sure it looks and feels right, you should buy the license and activate it. The license is valid for a single event and it includes complete, unlimited access to all of Sessionize's features. We don't offer subscription plans – all licenses are sold on a per-event basis.
If you plan to organize more than five events annually, please feel free to contact us to discuss bulk discounts.
For those just getting started with Sessionize we prepared a simple step-by-step guide, taking you through the entire process. Whatever you do while testing Sessionize will remain intact after buying the license. In other words, you're welcome to set up the entire event and simply move on to using it “for real” once it's activated.
Create an event
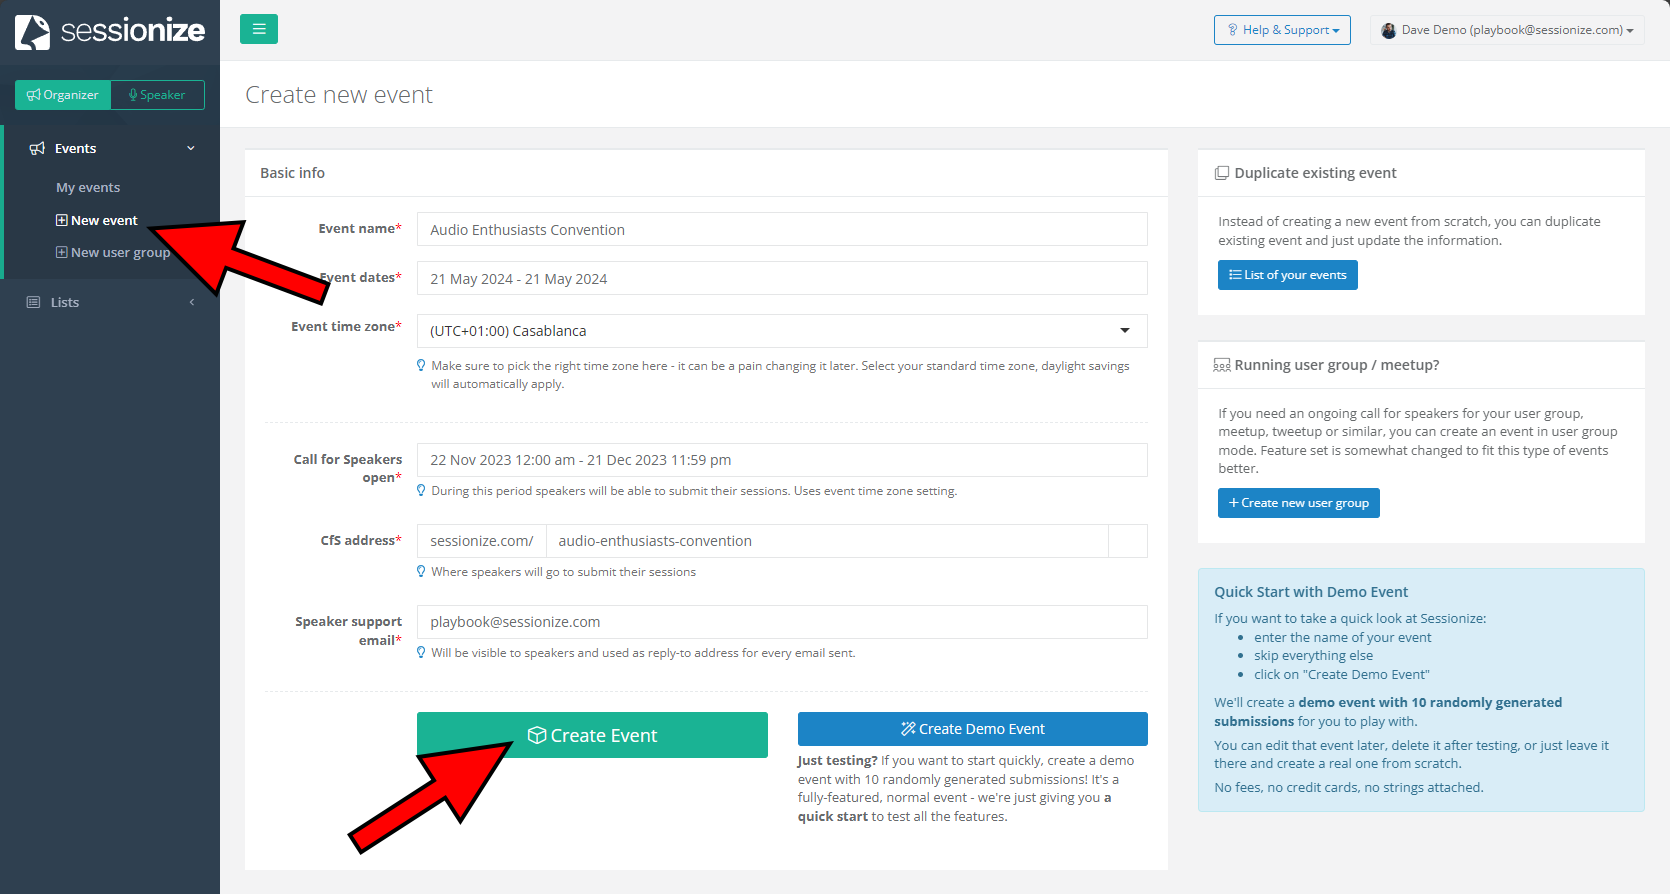
After creating an account, select the New event button from the menu. Pick a name for your event, select its start and end date, and adjust other basic options as necessary. Once you're happy with everything, click Create Event. Don't worry if you change your mind about a certain setting – you'll be able to change it later.

Fill out other details related to your event, including its description, logo, website, and information for the call for speakers page. Click Save changes & Continue once done.
Invite team members
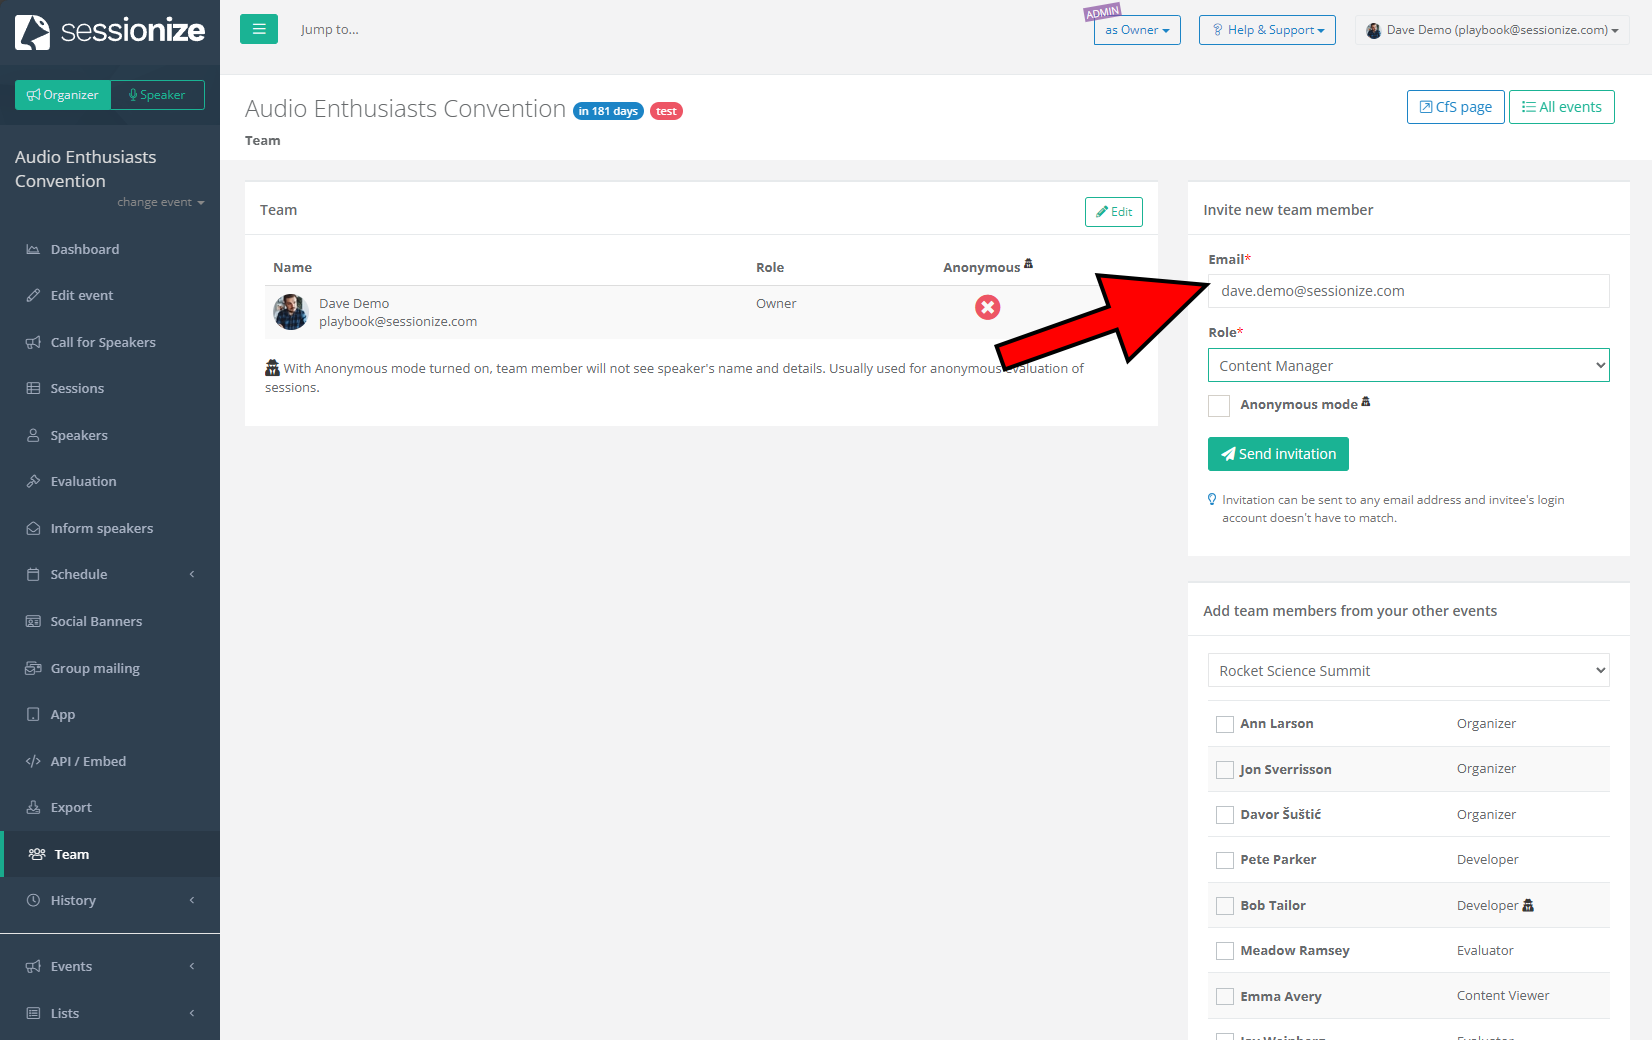
If you plan to have other people helping you organize your event, now is a good time to invite them. Click on Team in the menu, look for the Invite new team member section on the right, enter your team member's email address, assign a role for them, and confirm by clicking Send invitation.
Sessionize offers five different roles for team members, including two roles with full access, so you never have to share your login info with anyone. To find out more about the team roles, please refer to the following article: Team roles explained.
Set everything up
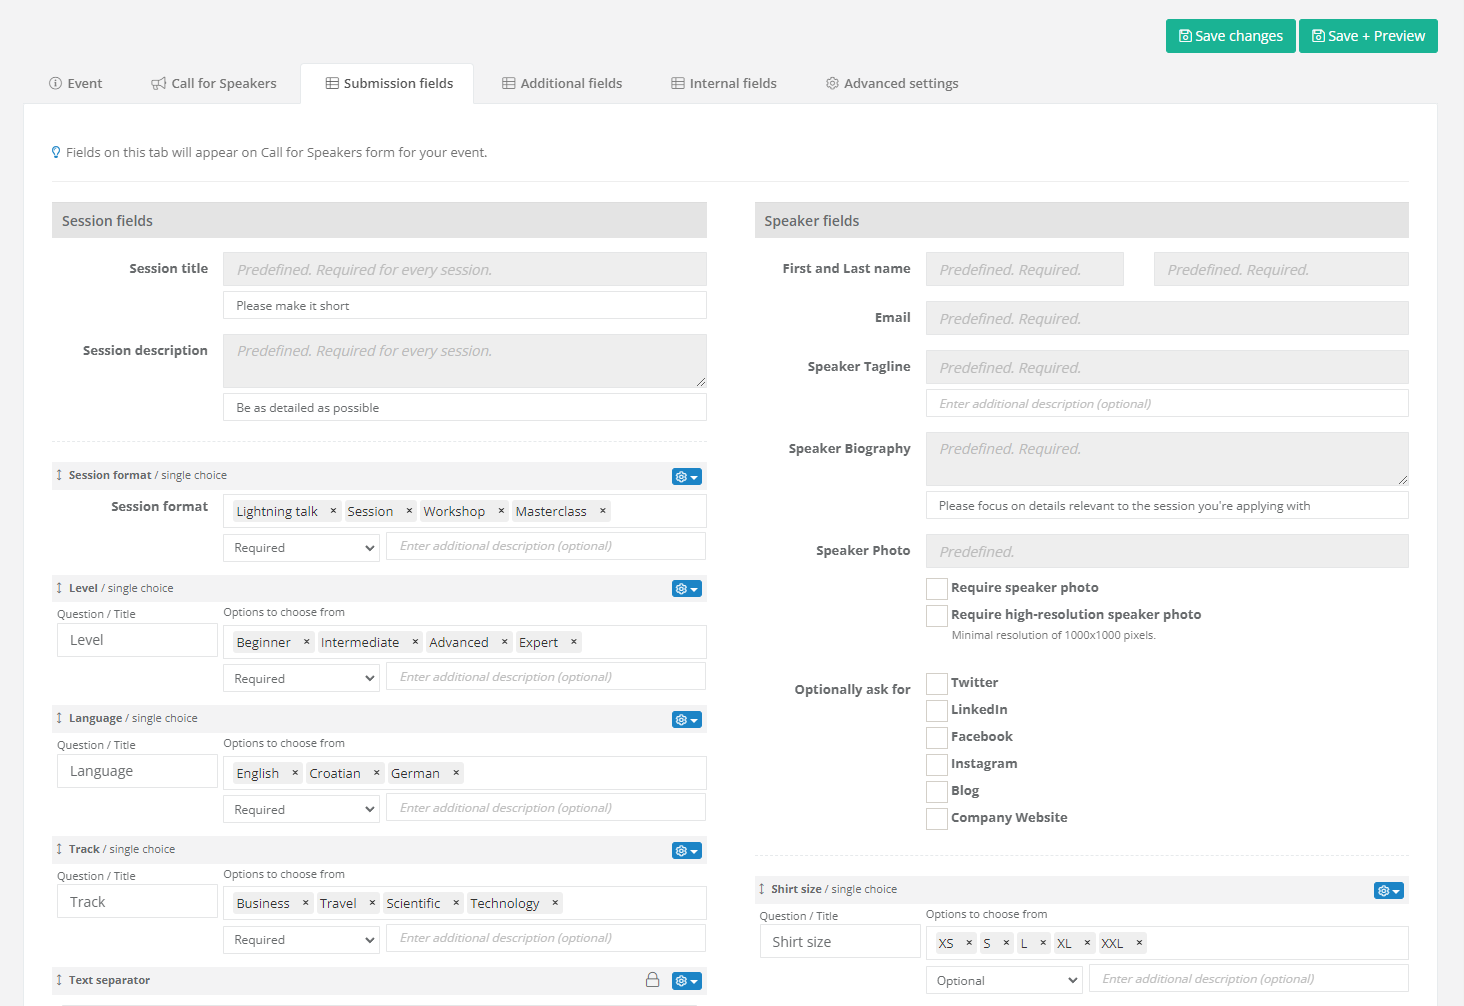
Now it's time to explore all the various features offered by Sessionize and utilize them to make your event the best it can be. We impose no limitations on what you can do – the entire platform is yours to use. You can fine-tune your event's details, greatly improve the call for speakers page by adding custom session and speaker fields, and so on. We encourage you to experiment and try out everything you might find useful and beneficial for your event.
Everything you do while testing and setting up your event will persist after you decide to buy the license. You don't have to worry about having to redo everything from scratch.
Buy and activate
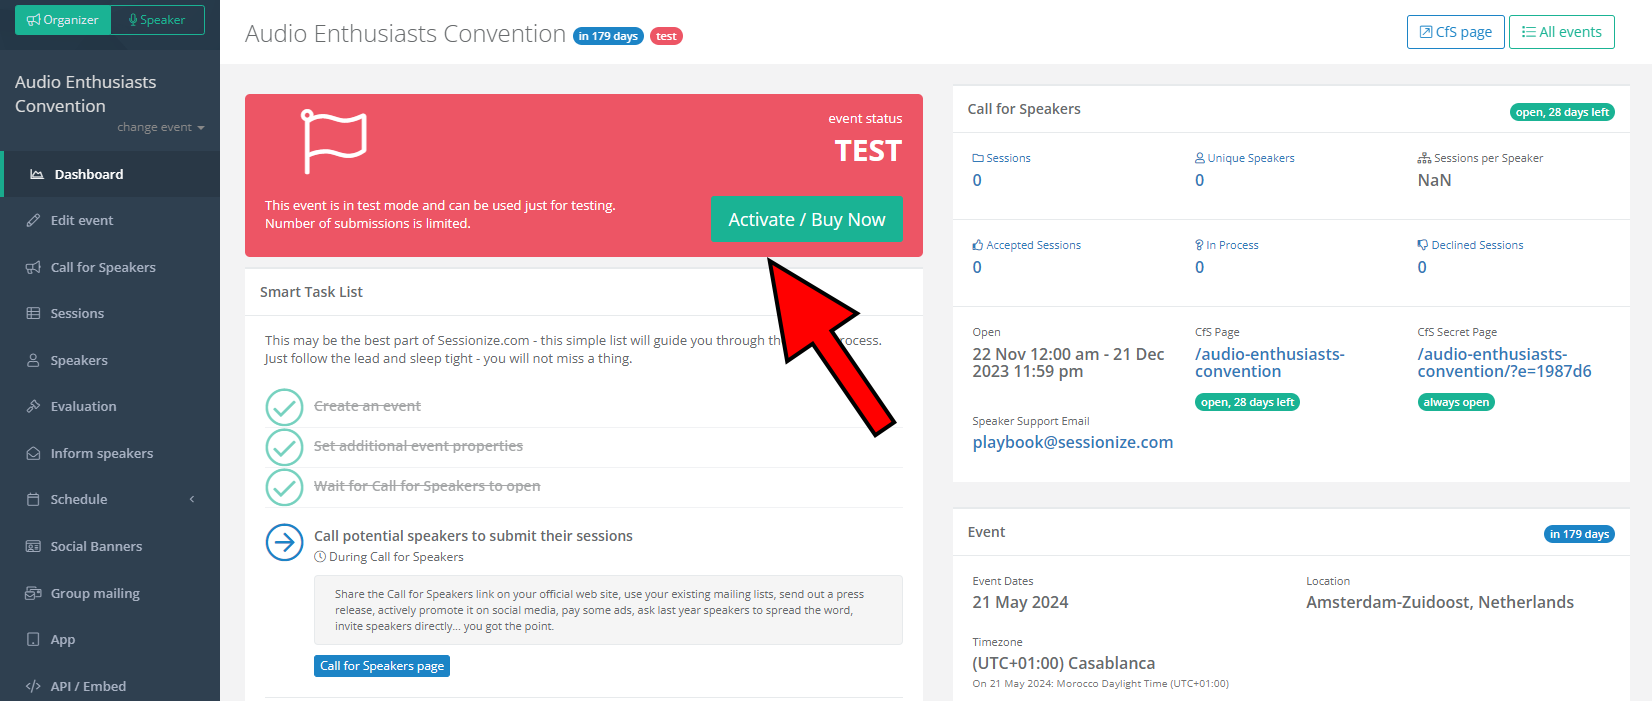
Once you're happy with what you see, you can proceed to buy the license and activate the event. Look for the appropriate button on the Dashboard. As mentioned in the introduction, the license is valid for a single event and it includes complete, unlimited access to all of Sessionize's features.
If you pay for the license with your credit card or via other supported digital payment platforms, your event will be activated instantly. Make sure to enter a valid VAT ID, should you want to purchase the license with no VAT included.
If you prefer to pay via a wire transfer, please contact our support and send us your organization data, including full address and tax numbers (if applicable). Please note that bank transfers take some time to process, so your event will not be immediately activated.